Dijon Ham Loaf

photo (71)

This is my family’s go-to meal. When we have family movie night, we make dijon ham loaf. When a family friend has surgery, we make dijon ham loaf. When I visit Seattle and we want comfort food, we make dijon ham loaf. So when I had to make bread for a class project (I’m writing a story about bread), clearly I decided to make dijon ham loaf!

To make this recipe (which makes one loaf, or about 5 servings), you’ll need:

4 cups of flour

2 T sugar

2 packages of active dry yeast

1 cup water

1/4 cup dijon mustard

2 T butter

1 1/2 cups chopped ham (I love to use the rosemary ham from Trader Joe’s!)

3 cups shredded swiss cheese

1 egg, beaten

Mix 3 cups of flour with the sugar and yeast. In a saucepan on the stove, heat water, butter, and dijon mustard to 125 degrees F. You can use a meat thermometer to gage the temperature, and make sure that it does get to exactly 125 degrees – which will probably happen in about 2 minutes over the heat. If the mixture is hotter than that, it will kill the yeast and the bread won’t rise. If it’s colder than 125 degrees, then the yeast won’t activate at all.

Once the mixture is 125 degrees, stir the wet mixture into the dry mixture. Mix in some of the reserved flour until the dough becomes soft. Dump it out onto a floured surface and knead for a few minutes.

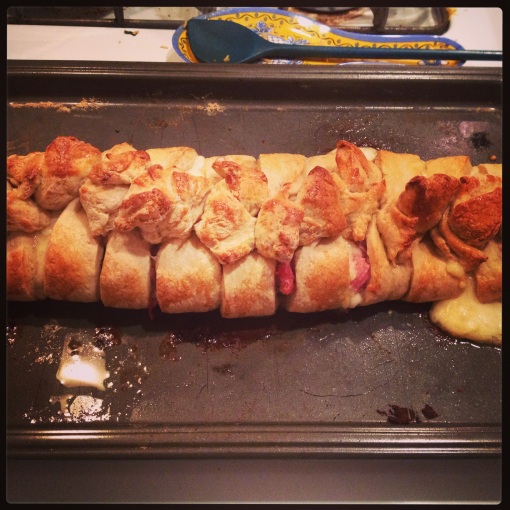
Put flour on a baking sheet and roll the dough out until it’s about an inch thick and shaped like a giant rectangle. Sprinkle the ham and cheese in a line down the center of the dough (pile it up!) and then make cuts along the edges of the dough, leaving an uncut area in the middle for the ham and cheese. Cut the same amount of strips on each side of the loaf, each about an inch thick. Then bring the opposite strips together, twist them, and place the ends at angles across the top of the bread.

Once the entire loaf is braided, cover it with a cloth. Fill a large, shallow pan with boiling water and place the bread over the pan to help it rise for 20 minutes. After 20 minutes, brush the loaf with beaten egg (this will help it become golden brown) and put it in the oven at 375 degrees for 25 minutes.

You’ll be able to tell when it’s done because the bread will sound hollow when you tap on it with your finger. Cut it into 2 inch thick slices, and serve with a green salad or some asparagus/ broccoli. You can also freeze a loaf if you’re cooking for yourself and don’t think you’ll eat it all in one sitting.

Enjoy!
Mini Cheesecakes

photo-8

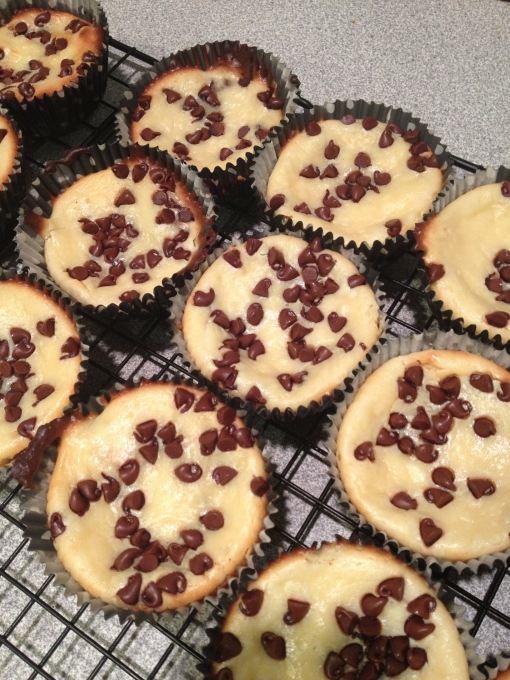
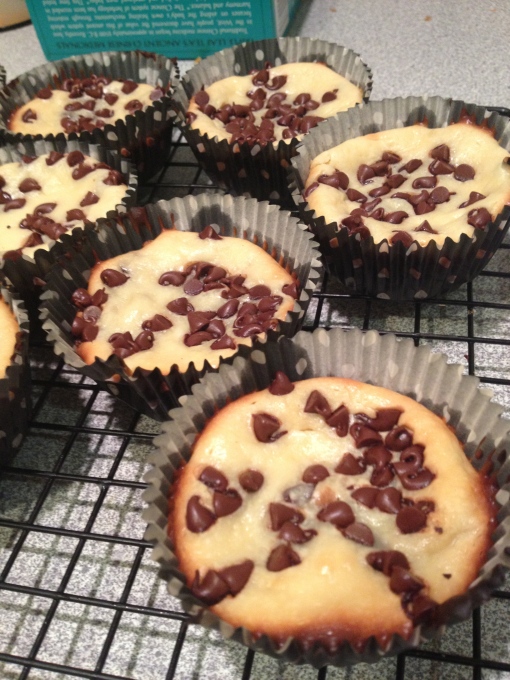
Back at Bucknell, people used to put in special requests for my mini cheesecakes. I made them last night for our Bachelor watching party, so I figured that I’d make it into a post and finally share the recipe with the internet world. Honestly, I don’t even LIKE cheesecake, but I have to use immense restraint to keep myself away from these little things. They are an awesome combination of salty and sweet, and because they are so small, you can easily talk yourself into having two… and then three… and then four. I made two dozen last night and there are only two left today! If you love cheesecake, only make these when you’re having people over. Seriously. Otherwise you will eat at least ten!

This recipe makes two dozen, but you can 1/2 it to make 12, or double it to make 48, depending on the occasion. I’ve found that 12 of these little guys is never enough, hence the portions for the recipe I’m posting here. Also, I need to give credit where credit is due – I found this recipe over a year ago on Pinterest. It’s from the website Baking Bites, and has become a part of my go-to baking repertoire. MAJOR YUM.

For this recipe you will need:

2 cups of graham crackers, broken down into crumbs

4 T brown sugar

small pinch of salt

5 T butter, melted

16 oz cream cheese, softened (that’s two bricks)

4 T sour cream (or greek yogurt, unsweetened)

2/3 c white sugar

2 eggs

2.5 t vanilla extract

2 c mini chocolate chips

Preheat your oven to 350 F. Then line 2 muffin pans with cute paper liners (this recipe makes 24 mini cheesecakes).

First, make the graham cracker crust. You’ll need to crunch up the graham crackers – I find that the best way to do this is to put them in a giant zip lock bag and whack them with something sturdy, like an ice cream scoop. Then combine the crumbs with the brown sugar and a pinch of salt. Mix those ingredients in a small bowl, then add the melted butter and stir to combine.

Put a spoonful of the graham cracker mixture in the bottom of each muffin cup and press the mixture down with your fingers into an even layer. This will be the cheesecakes’ crusts!

Then, make the cheesecake mixture in a larger bowl. Your cream cheese needs to be a bit softened, so leave it on the counter for at least 30 minutes before starting the recipe. If you forget, pop it in the microwave for 10 seconds. Add the cream cheese, sour cream and the sugar in a bowl and blend with a hand mixer or a kitchen aid mixer until creamed. Then add the eggs and the vanilla. A word to the wise – imitation vanilla extract may be cheaper, but real vanilla is always better! Pay those extra few dollars – it can make or break a recipe!

Go back to your cupcake pans and add a spoonful of mini chocolate chips to each muffin cup. Then spoon a heaping spoonful of cheesecake mixture over the chocolate chips. Finally, cover that layer of cheesecake mixture with another spoonful of chocolate chips and deposit the pan in the oven for 20-25 minutes. You’ll know that your cheesecakes are done if you shake the pan and the cheesecakes look and feel set (ie. not jiggly).

Let the mini cheesecakes cool for a few minutes, then take them out of the cupcake pan and leave them on a wire rack so that they can cool completely. Enjoy!

photo-7

Lots of love, Jenni

Carrot Coconut Bread with Cream Cheese Glaze

Hilary is on a ski trip and Danielle is working, so last night it was just me, myself and I in our lovely apartment. So what’s a lonely 20-something to do in an empty apartment? Bake, of course! I made myself an awesome dinner for one (baked salmon with lemon dijon sauce over a bed of sautéed onions and spinach – I’m having a love affair with salmon lately!) and then set out to find a perfect recipe to bake. As always, Pinterest didn’t disappoint.

The great thing about my kitchen now is that because we’ve lived here for about 6 months, we finally have a great stockpile of ingredients and spices. That means that when I get the urge to bake or cook, I often don’t have to go to the grocery store (this is great because a trip to the grocery store usually threatens to kill my cooking inspired mood!). Case in point: last night. I found this recipe for Carrot Coconut Bread with a Cream Cheese Glaze on Pinterest, and was delighted to discover that I had all of the necessary ingredients on my shelves. All I had to do was start cooking!

Credit for this recipe (I modified it a bit) goes to another food blog, easyeverydayeats.com. Check them out :).

2013-01-10 12.36.00

For this recipe, which makes two small 8×3 inch loaves, or one big 9×5 inch loaf, you will need:

1 1/4 cup shredded carrots

1 cup sweetened coconut flakes

1 1/4 cups flour

3/4 cup sugar

1 t baking powder

1 t salt

1/2 t baking soda

1 t cinnamon

1/4 t nutmeg

1/2 cup melted butter, cooled (or vegetable oil, if you prefer)

1/2 cup sour cream

2 eggs

1 t vanilla extract

Preheat your oven to 350 degrees. Then mix together all of the dry ingredients in one bowl – flour, sugar, baking powder, baking soda, cinnamon, nutmeg, salt and coconut. Set that bowl aside.

Whisk together all of the wet ingredients in a separate bowl – eggs, butter (make sure it’s cooled after you melt it. Like I mentioned before, you can use vegetable oil if you want to be healthier. I went for the butter – go big or go home, right?), sour cream and vanilla. Then grate the carrots and stir them into the wet mixture.

Fold the wet mixture into the dry mixture just until combined. Then pour your batter into lightly greased loaf pans and bake at 350 degrees F for about 55 minutes for a big loaf, and 35-40 minutes for smaller loaves.

When the loaves are lightly browned and look set, stick a tooth pick in the center. If it comes out clean, the bread is done! Cool for about 10 minutes on a rack, then remove loaves from the pans and put them back on the wire rack. If you want to speed up the cooling process, you can stick the loaves in the fridge for about ten minutes.

While the loaves are cooling, mix up your cream cheese glaze! For the glaze, you will need:

1 cup powdered sugar

3 T cream cheese (ideally it should be softened to make whisking easier, although I forgot to soften it and it still worked fine)

2 T milk

1/4 t vanilla (to be honest, I ran out of vanilla, so I didn’t put any vanilla into the glaze and it was still great!)

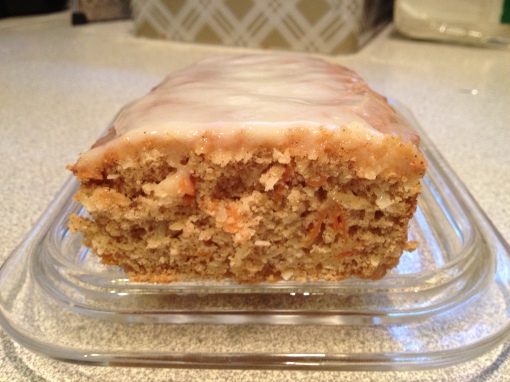
Whisk those ingredients together in a small bowl and spread on top of the loaves when they are still slightly warm to the touch. When they are hot, they will melt the glaze and it will roll off of the loaves. When they are slightly warm, they will absorb liquid better and the glaze will seep into the bread making it moist and sweet.

Store the loaves covered at room temperature! They are even better the second day. You could also freeze them if you want to save them for later.

If you’re a fan of nuts (I’m not), consider adding 1/2 cup of chopped walnuts to this recipe. Zucchini would also be a welcome addition, as it pairs well with carrots and would make the bread super moist! If you want zucchini in your bread, add 1/2 cup of shredded zucchini and 3/4 cup of shredded carrots.

So there you have it – quick, easy and delicious! The most annoying part of this is shredding the carrots, but try shredding them with a peeler. You’ll get long, thin strips of carrot that you can chop into smaller pieces with a knife. My boyfriend Sean came over right after I finished baking. He had just finished his daily MCAT studying and looked so miserable that I ended up sending him home to his roommate with the second small loaf. It was gone soon after he walked in the door of his apartment.

Lots of love,

Jenni

Recent Posts